Let's get your photos and videos from Facebook and Instagram.
Video walkthrough coming soon
Request your archive
Follow along on the Facebook page.
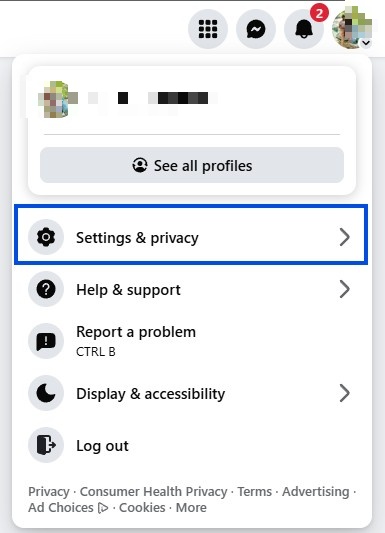
Work through these steps in the window you just opened. Take your time — just takes a few minutes.
Open the page
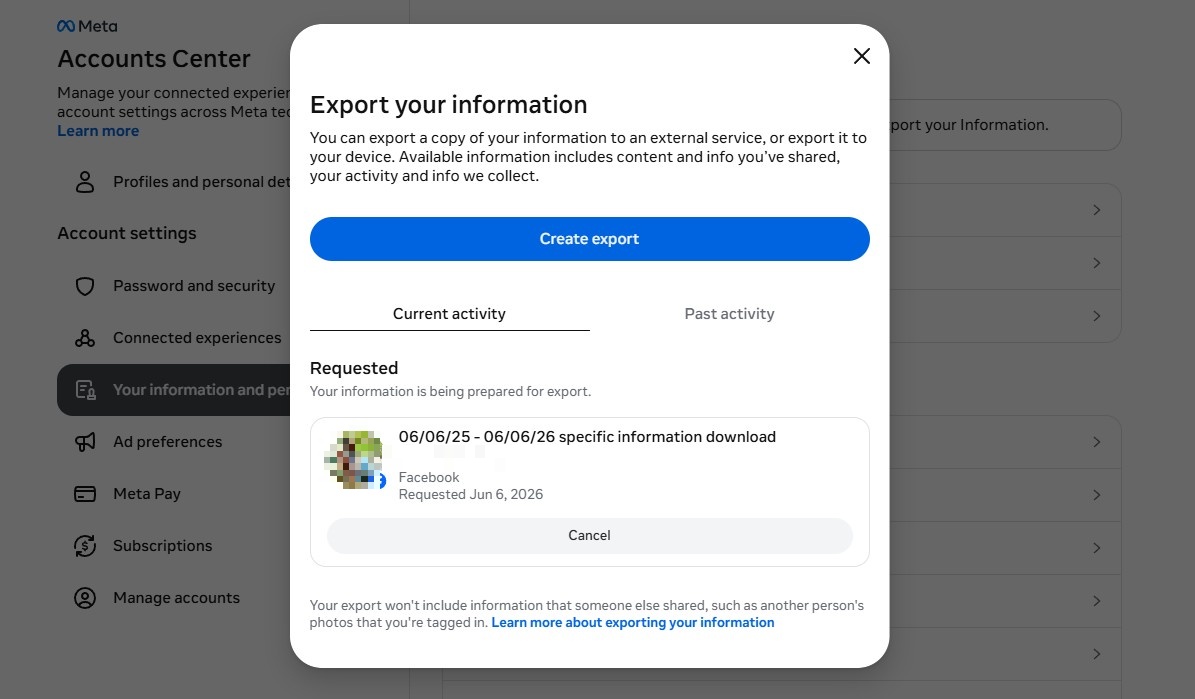
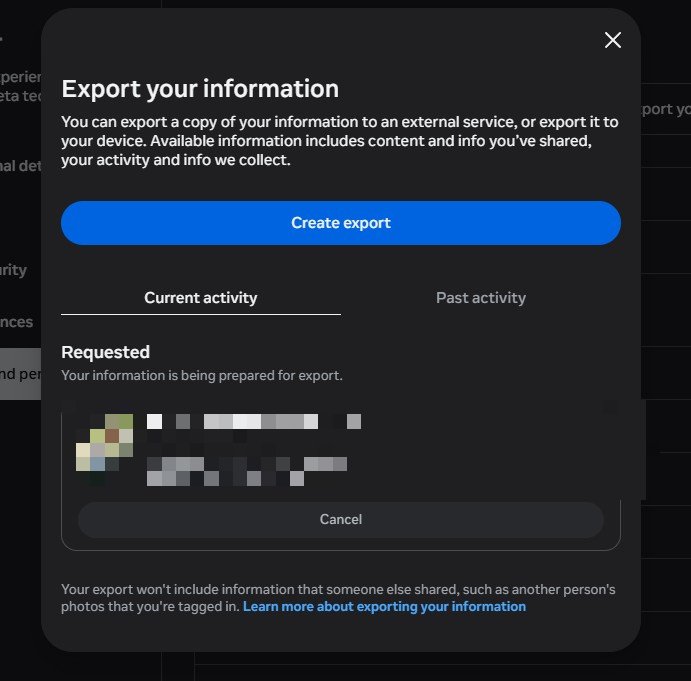
In the Facebook window, you should see a popup that says "Export your information." Click Create export.
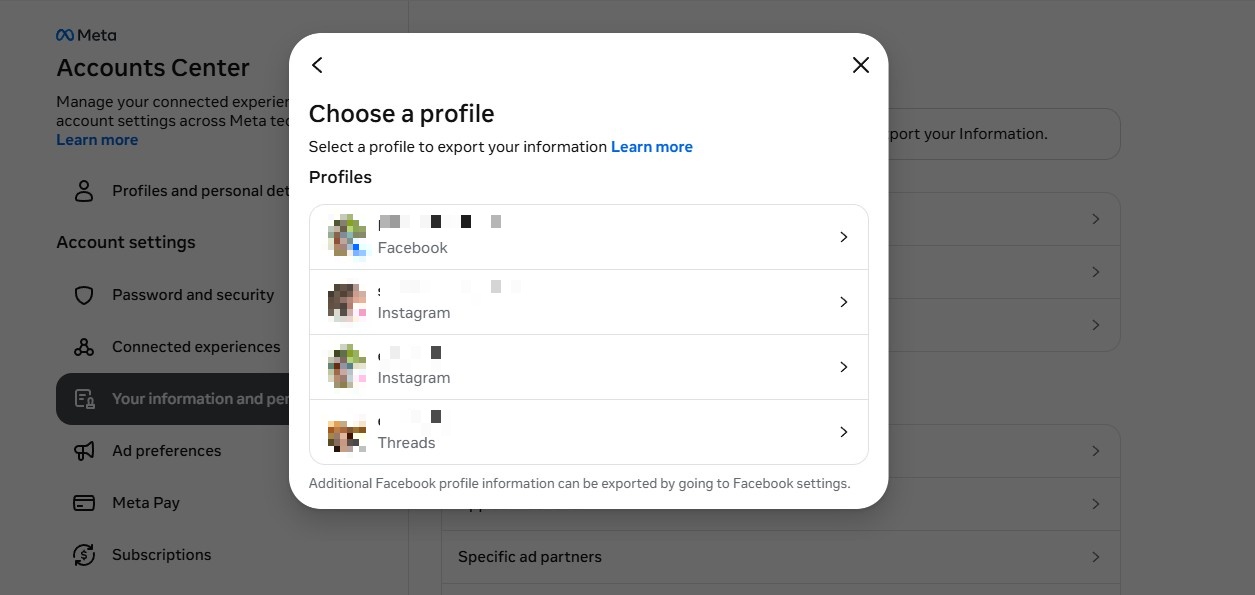
Pick your account
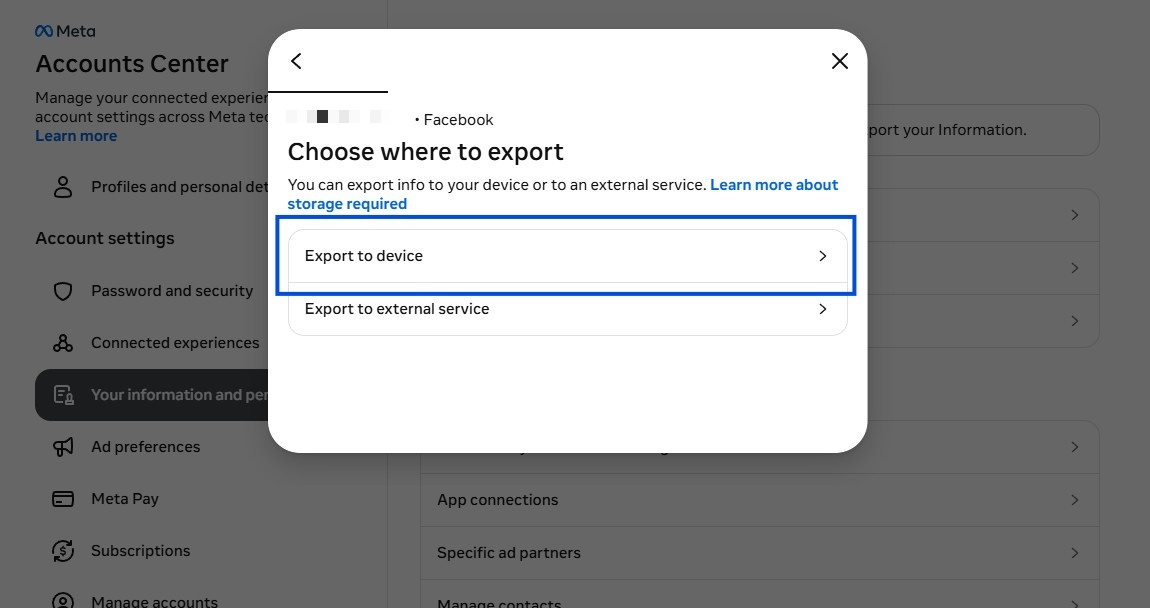
Select your Facebook account — you'll see your name and photo. On the next screen, choose Export to device.
Choose what to include
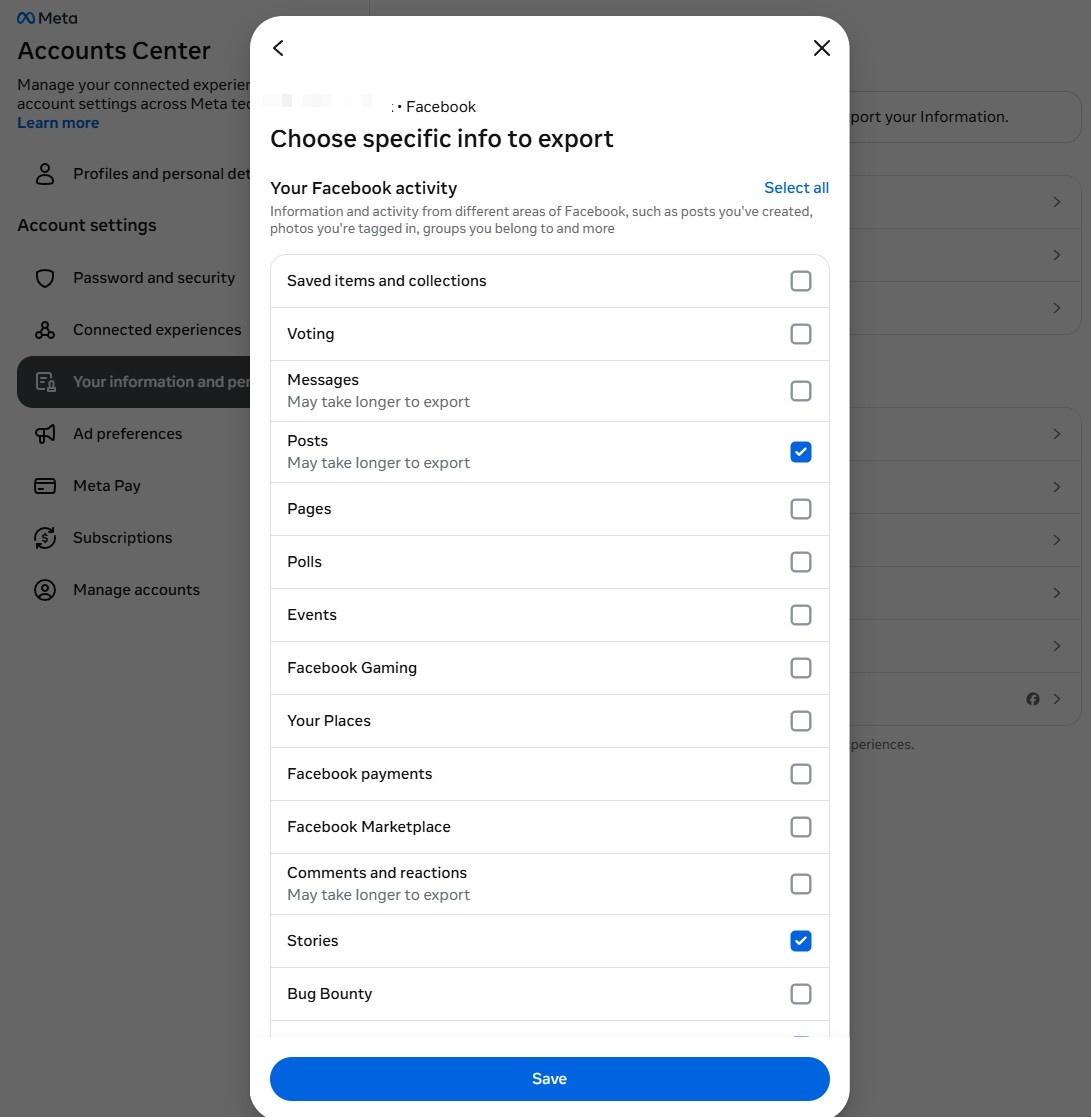
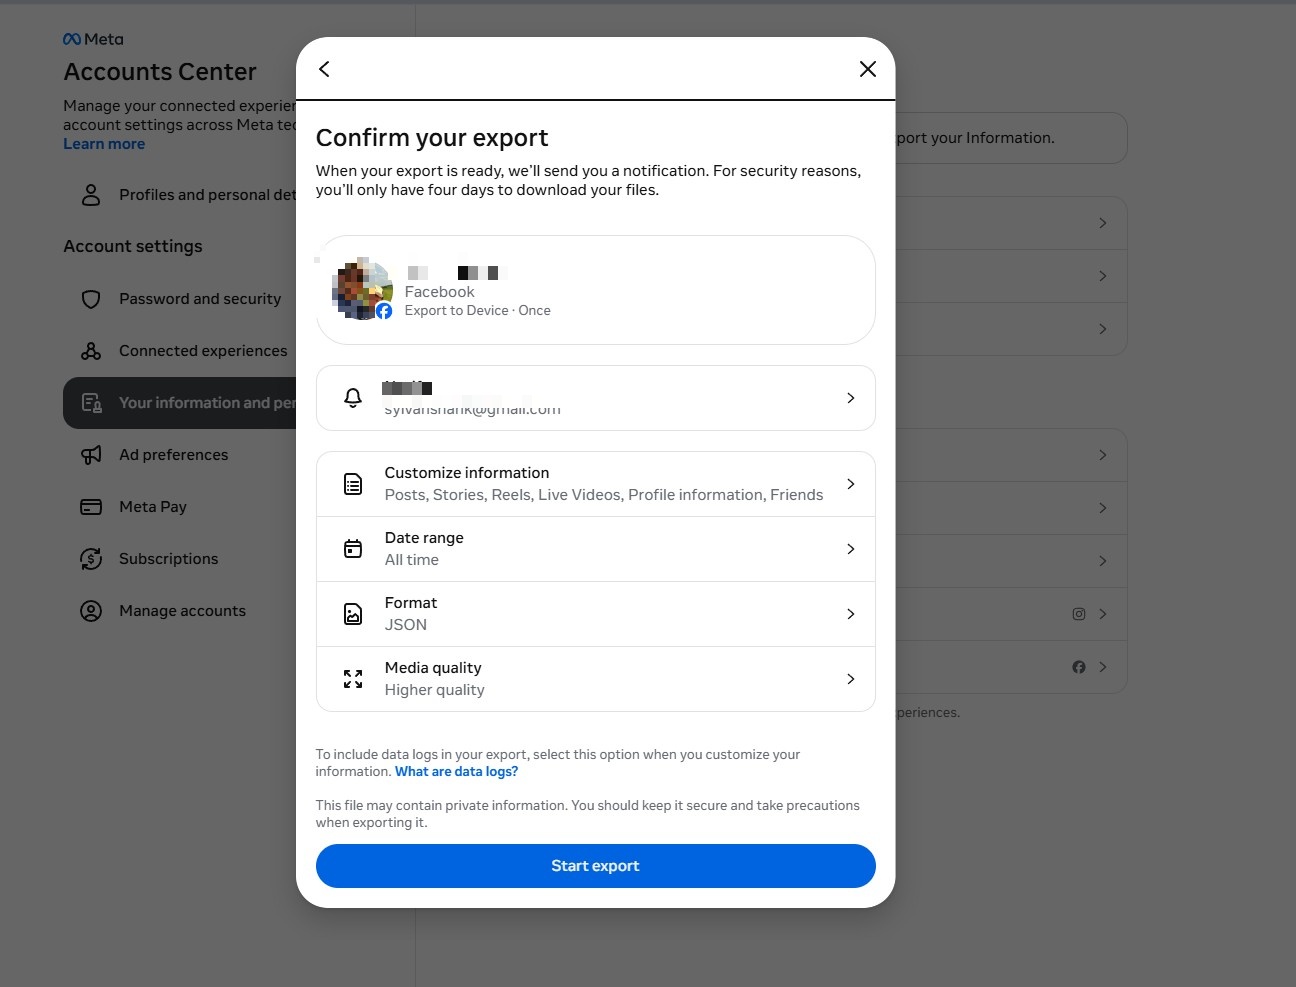
Click Customize information. You'll see a long list — scroll through and check only these items:
Your Facebook activity:
- ✓ Posts
- ✓ Stories
- ✓ Reels
- ✓ Live Videos
- ✓ Groups
Personal information:
- ✓ Profile information
Connections:
- ✓ Friends
To protect your privacy, leave these unchecked
- ✕ Messages
- ✕ Security and login information
- ✕ Ads information
- ✕ Data logs (takes 15 days and contains nothing useful)
- ✕ Everything in Logged information, Security, and Preferences
Set the format and quality
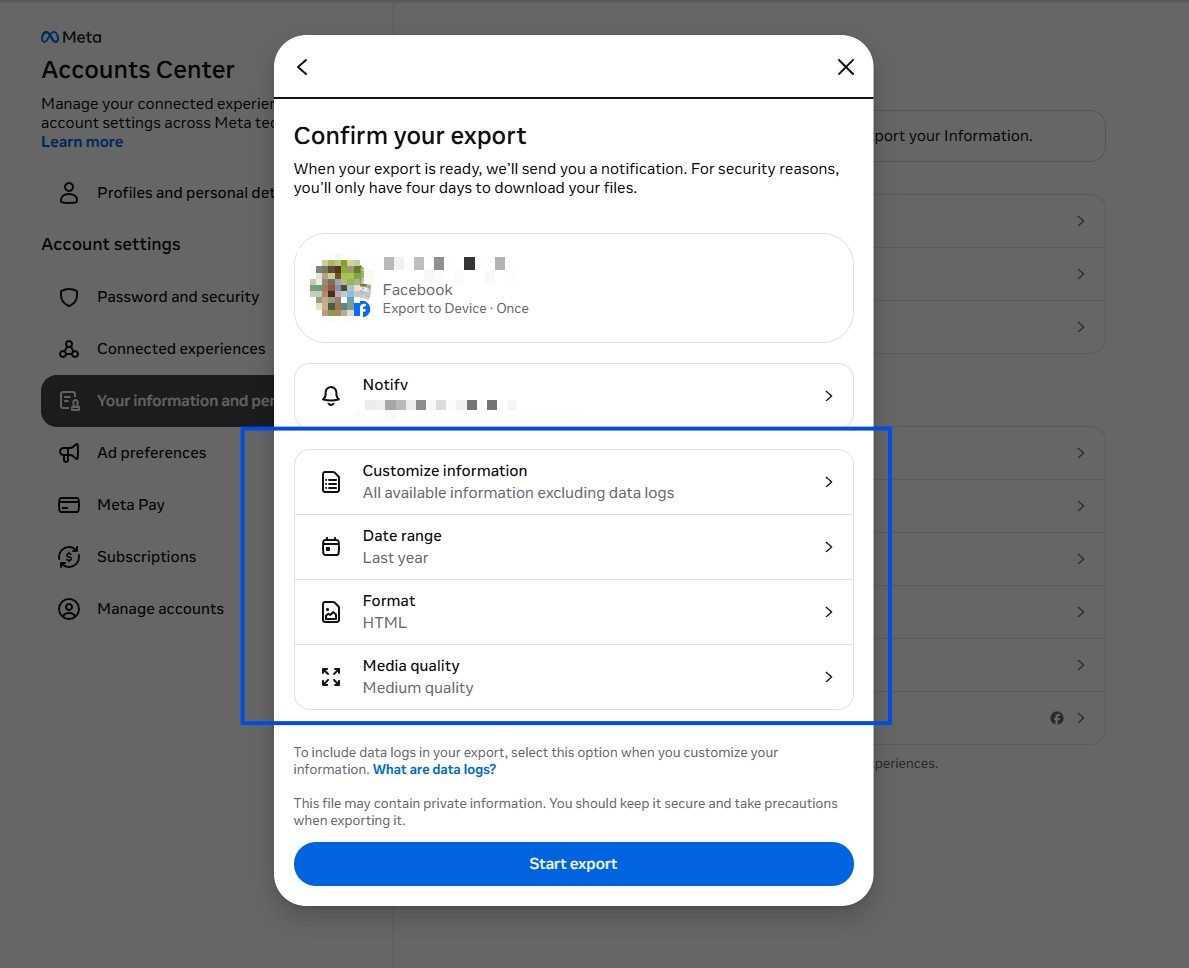
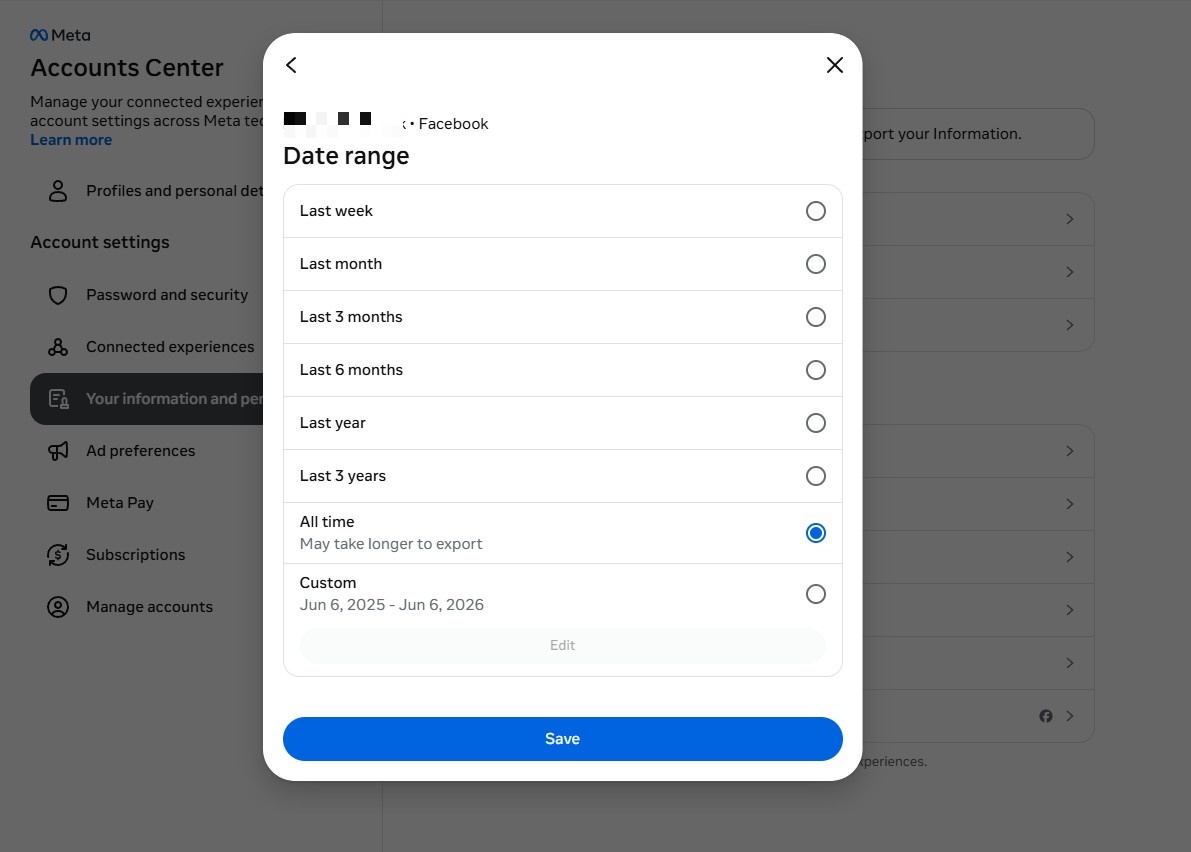
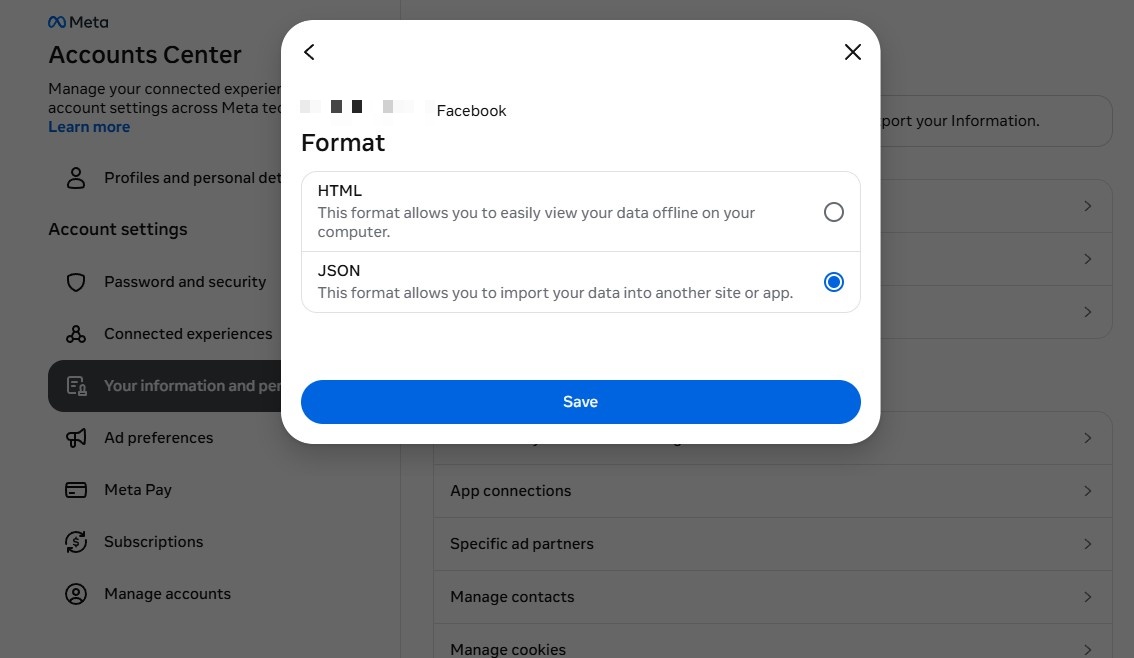
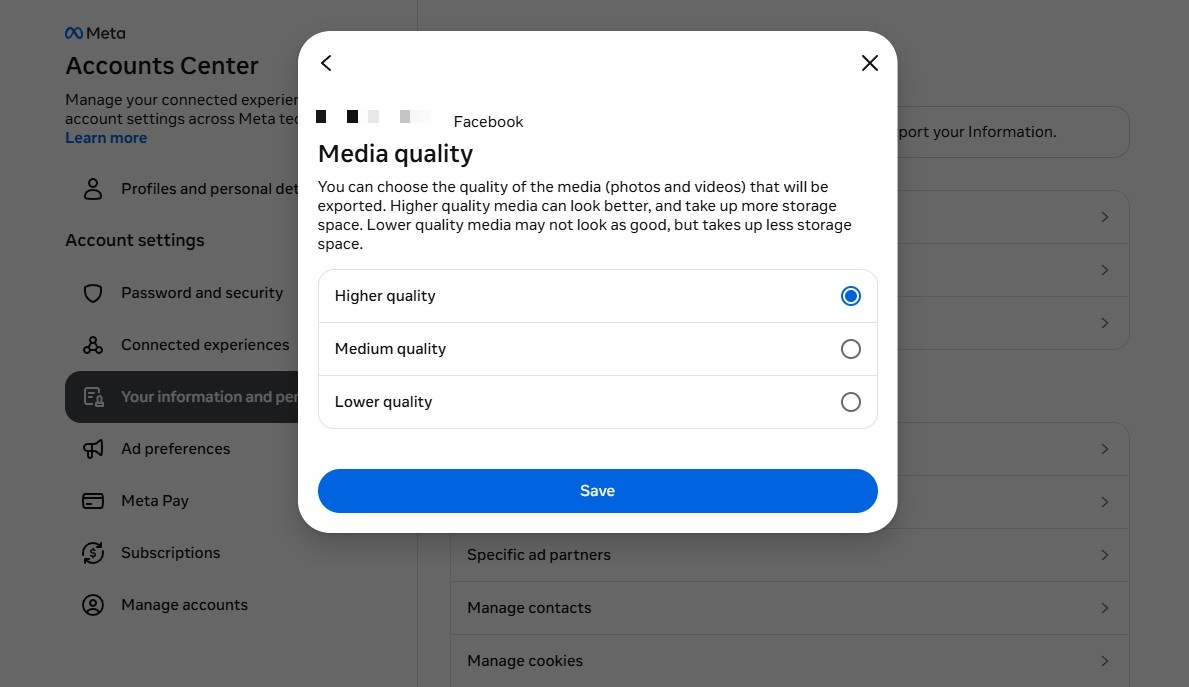
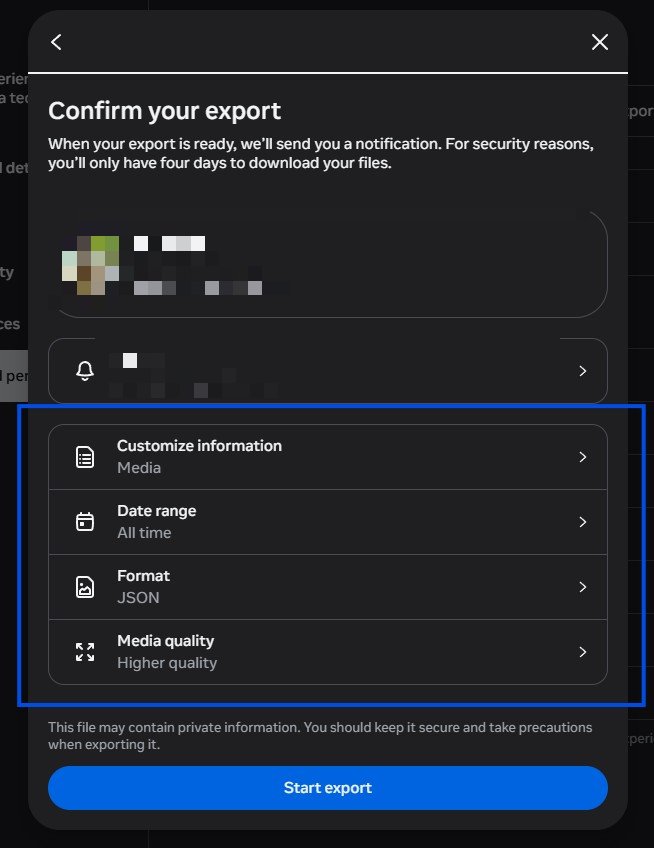
Back on the "Confirm your export" screen, set these three options:
- ✓ Date range: All time
- ✓ Format: JSON (not HTML)
- ✓ Media quality: Higher quality
Create the export
Review your settings and click Create export. Facebook will email you when your archive is ready — usually a few hours, sometimes up to a couple of days.
Open the page
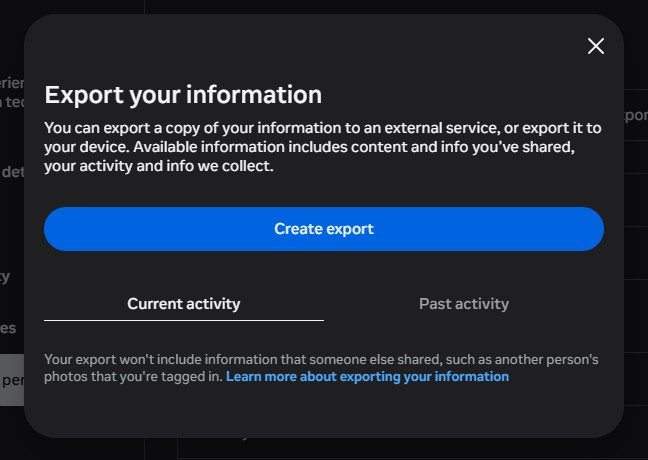
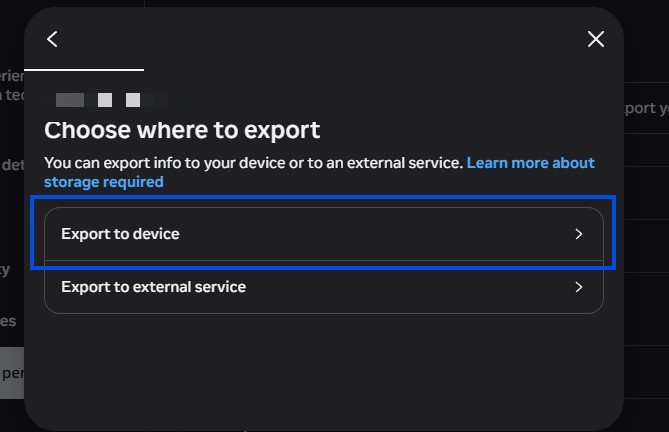
In the Instagram window, you should see an "Export your information" popup. Click Create export.
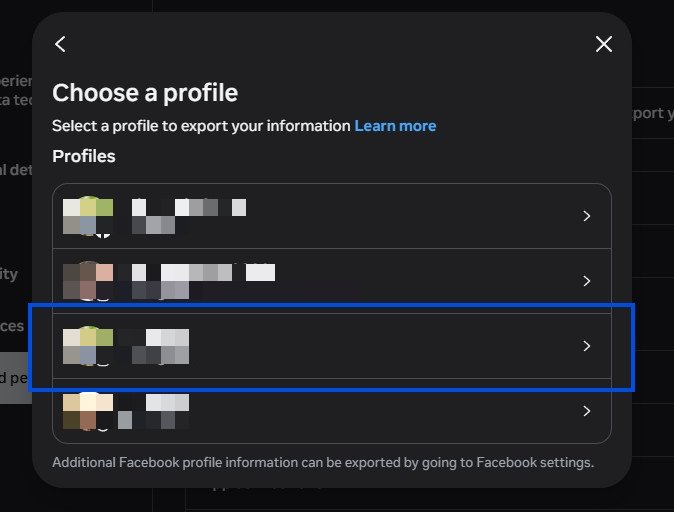
Pick your account
Select your Instagram account — you'll see your username and profile photo. On the next screen, choose Export to device.
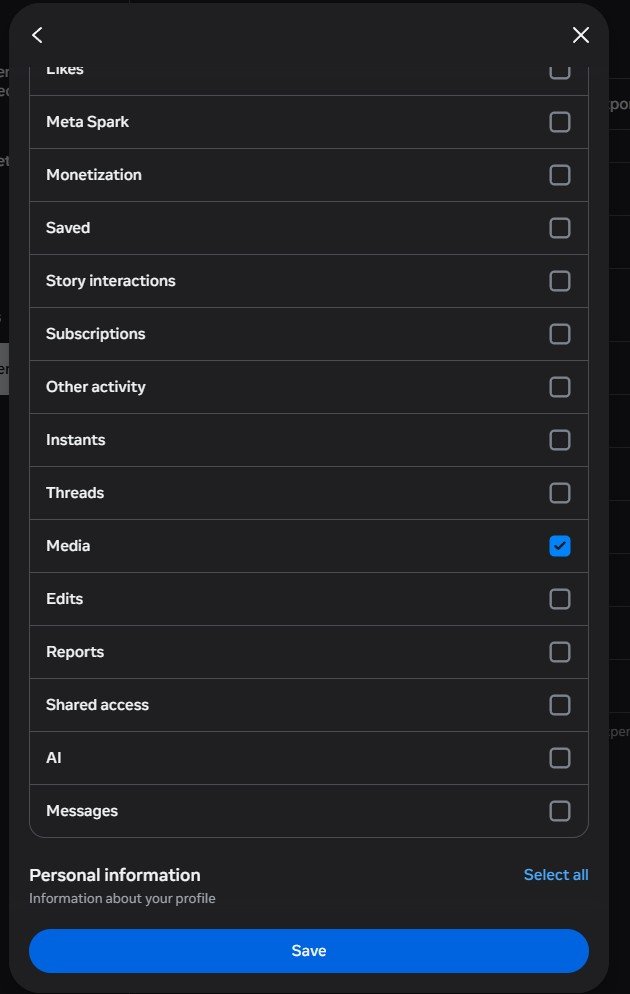
Check Media only
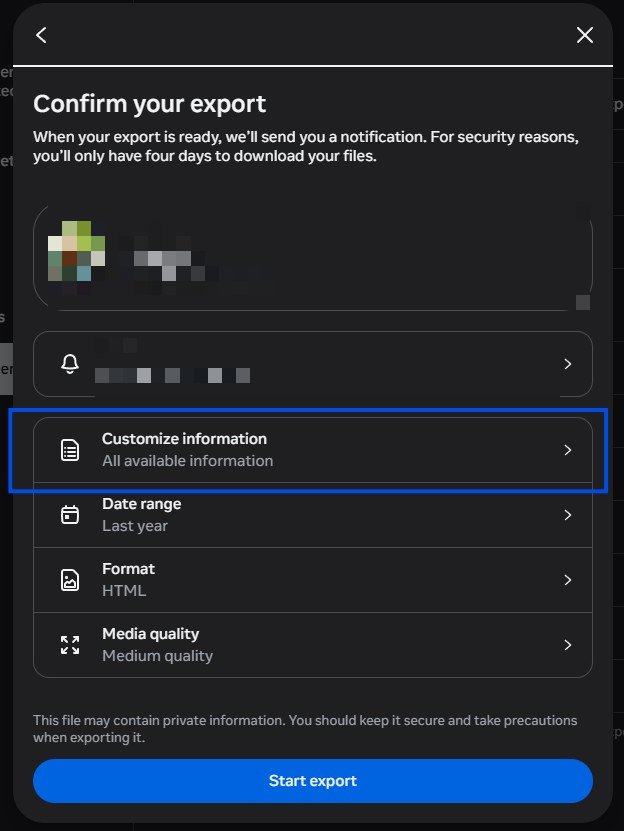
Click Customize information. Scroll through the list until you find Media — check that box only. Leave everything else unchecked.
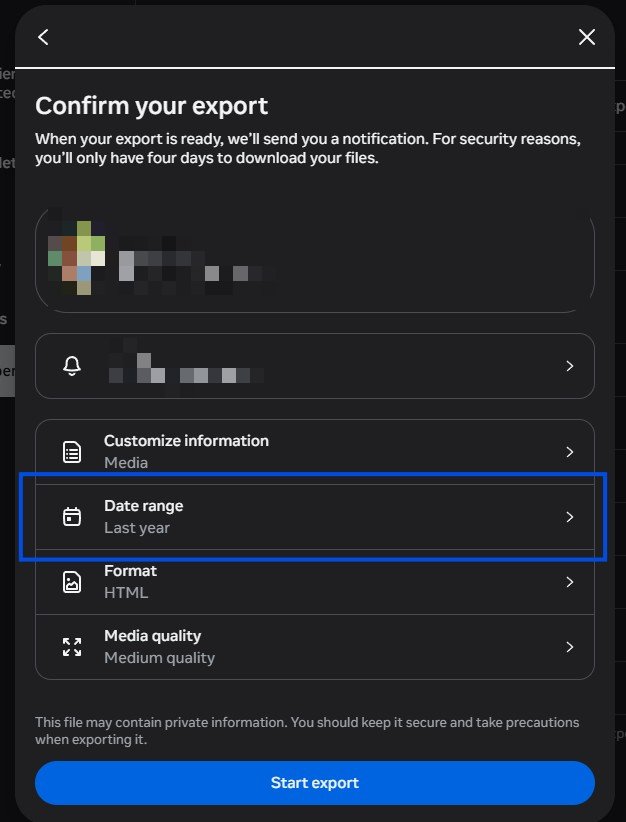
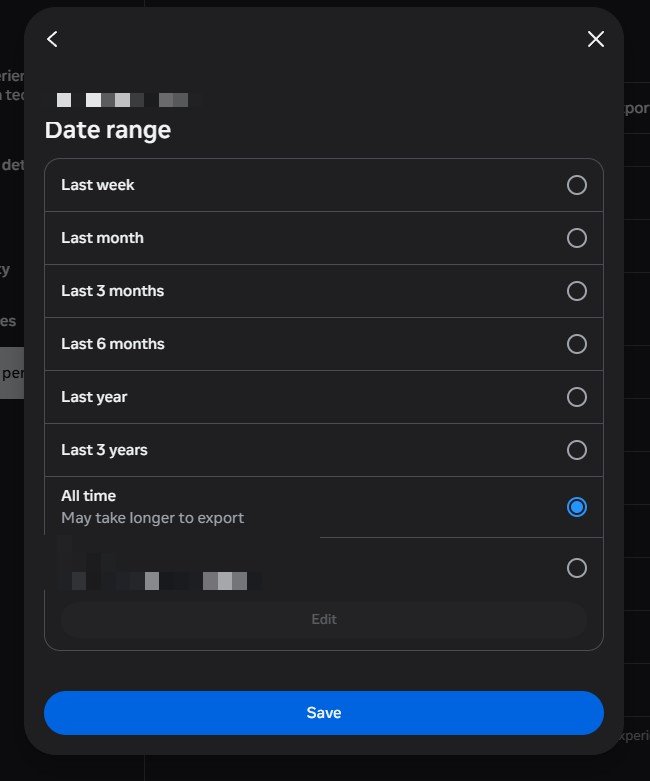
Set the format and quality
- ✓ Date range: All time
- ✓ Format: JSON (not HTML)
- ✓ Media quality: Higher quality
Start the export
Click Start export. Instagram will send you an email when your file is ready — usually a few hours, sometimes up to a couple of days.
Save your place so you can come back
Facebook and Instagram take a day or two to prepare your file. Here are two easy ways to pick up right where you left off when it's ready — use either, or both.
Email me the steps + my upload link
We'll send these instructions and the link to come back and upload — so you can do this at your own pace and won't lose your place. No spam, just that.
You're all set.
Check your inbox for your steps and upload link. We'll remind you when it's time to come back and upload.
app.everkeptphotos.com/upload
Common questions
How long does it take to get my archive from Facebook or Instagram?
After you request it, Facebook or Instagram prepares your file and emails you when it's ready — usually within a few hours, sometimes up to a couple of days for larger accounts. You don't have to wait on the page; they'll notify you by email.
Which file format should I choose when requesting my archive?
Choose JSON, not HTML. JSON is what lets everkept read your photo dates and captions correctly. Also set the date range to All time and media quality to Higher quality so you get everything at the best resolution Facebook or Instagram has stored.
Do I need to give everkept my Facebook or Instagram password?
No. everkept works from the archive file (a ZIP) you download from Facebook or Instagram. It never asks for your password and never logs in on your behalf.
Will requesting my archive change or delete anything on Facebook or Instagram?
No. Requesting your information creates a copy of your photos and videos. Your original posts stay on Facebook and Instagram exactly as they were — nothing is deleted or changed on your profile.
What happens after I download the file?
Come back to everkept and upload the ZIP file. everkept identifies the people in your photos and organizes everything by person and year into one gallery you can preview for free.